Monday, September 1, 2014

Vanilla Bean Cardamom Peach Pie


I went with a full-size pie this week, you guys. I've been wanting to try this peach and cardamom pie, complete with latticed top, for a while now, and it seemed like trying a new crust technique AND going miniature-size was asking for trouble. However, now that I'm an expert at it, look for a jam jar version of this woven pie top in the near future. It's almost apple season, after all. 

I have lots of links for you today. The main recipe I followed comes from Pastry Affair, and, though I know I say this frequently, I once again highly recommend checking out the original post; the photography is so good. For the pie crust, I went to Emily Hilliard's tried and true Nothing in the House recipe, and it turned out great (even though I used a food processor to mix everything instead of her spoon/bowl/hands recommendation). Then, when it came time to fashion that fancy, woven crust pattern, Smitten Kitchen's lattice tutorial was extremely useful.

Here's square one-and-a-half. I made the pie crust without taking pictures, but nothing exciting happened, so it's okay. I was mildly concerned that I didn't see the 'coarse sand' texture happen when I pulsed the butter into my dry ingredients, but everything seemed to come out properly in the end. I wrapped the dough-discs in plastic and chilled them for more than an hour before embarking on this leg of the project. Ingredients are fairly basic - the vanilla beans and cardamom are really the stars here, along with the fresh, summery peaches, of course.


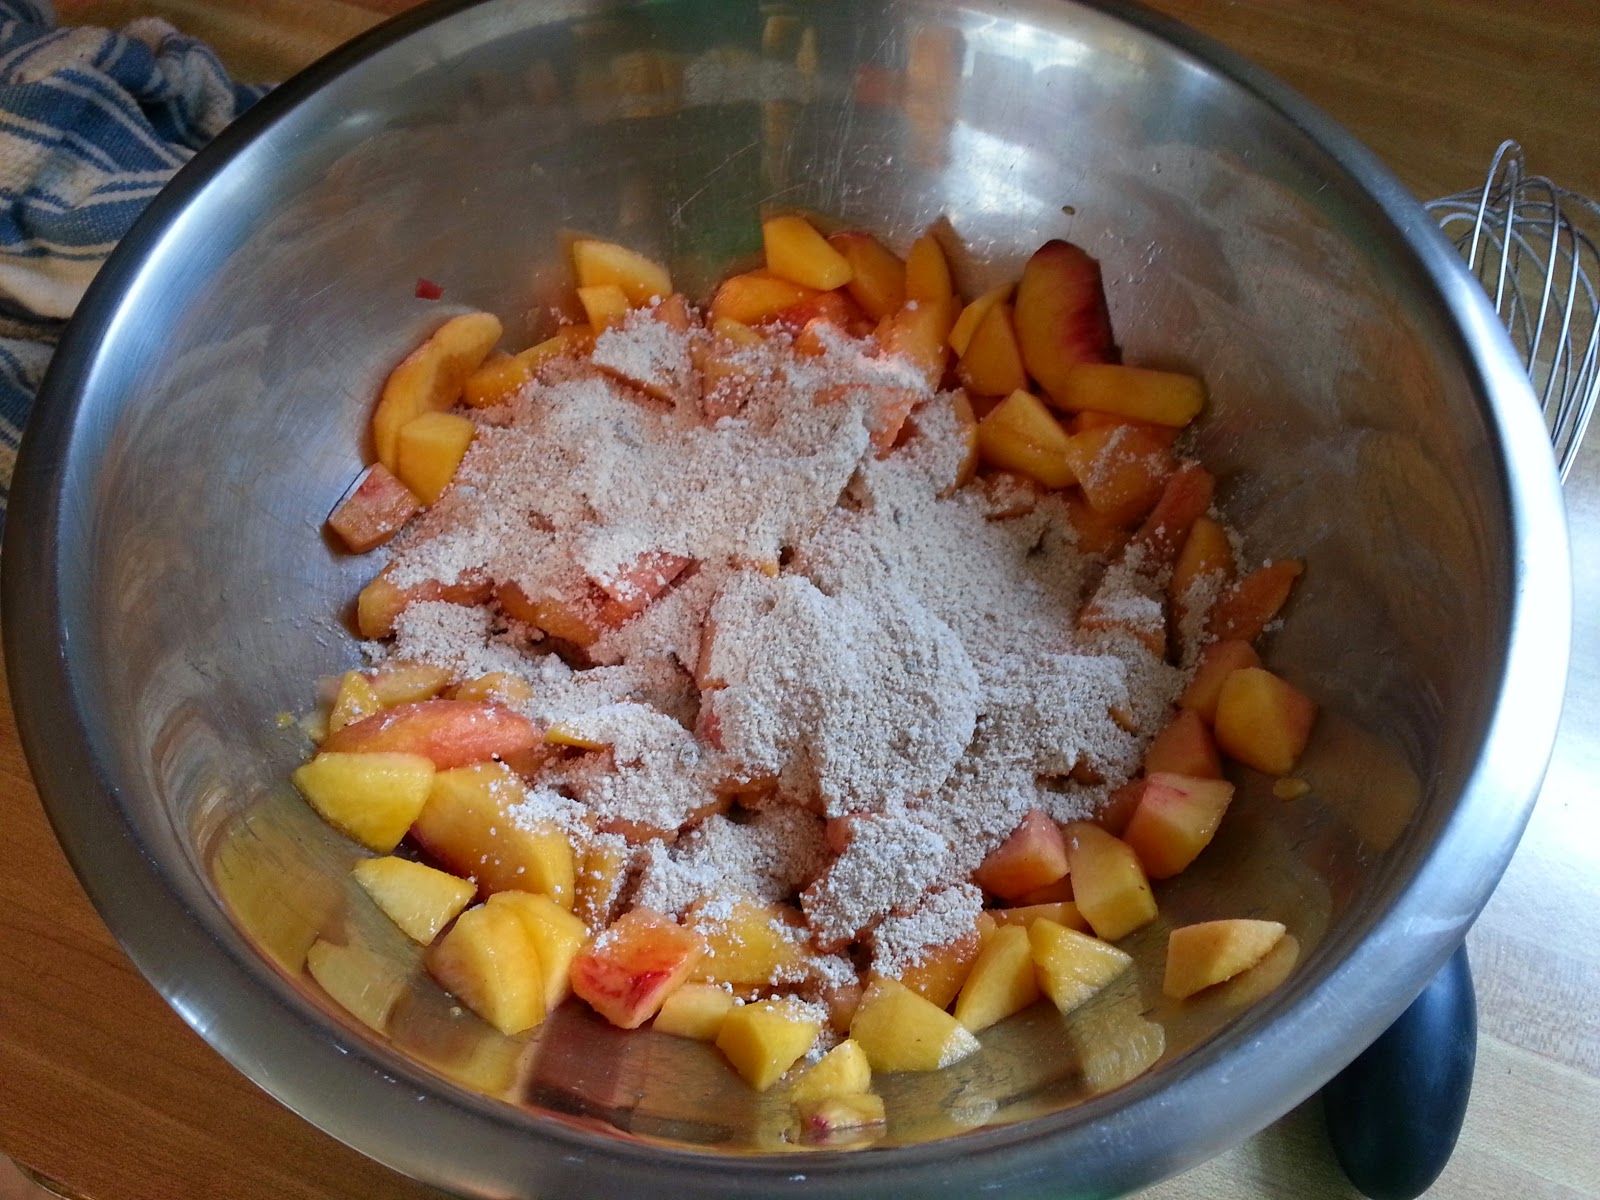
 Labor Day was pretty stormy here, so the color and aroma of these peaches was a welcome contrast - like a lil' bowl of sunshine, isn't it? (Among other things, this week's recipe underscored the fact that I have a lot to learn about slicing peaches in a uniform and pretty manner...)


There are few things in this world more satisfying than scraping vanilla bean seeds out of their pods. The flavor I got out of this little guy was not disappointing.


So the vanilla beans went into the filling along with the other standard ingredients, and everything got tossed together and dumped into the waiting pie crust. So far, so good. Without incriminating myself and under the condition that there will be no follow-up questions, I'd like to point out that this week you get to see the rolling out of the crust from dough-disc to filling-ready because making my own from scratch isn't always something that happens in this amateur kitchen...but this week it did! :)


Okay, are you ready to lattice? This technique was surprisingly easy, especially for anyone who was a kid in the 80's and had the benefit of growing up with the Make Your Own Pot-Holder loom kit like I'm sure a lot of us did.


The basic over-under pattern wasn't hard to recreate with pie crust. My one mistake was probably making my strips a little too wide, so I had fewer of them to work with than I'd've liked (appreciate the double contraction, please...it's one of my favorites).


Next time, I'll make them closer to 1/2-inch strips. For a first try, I'm content with the finished result, especially after I went around the edges to trim, tuck, and generally polish everything up to acceptable 4-oz Kitchen standards.


After 40 minutes in the oven, I had to put foil around the edges since they were browning faster than the rest of the pie. In the process of putting the foil-edged-pie back into the oven to finish baking (which is rather delicate, since the foil is tucked around the edges in the same places I need to put my hot-padded, clumsy paw-hands), I may have almost dumped the whole thing into the nether-reaches of my oven...ALMOST. 

But in the end, everything came out looking pretty beautiful. I think some home-made cinnamon ice cream (or caramel, or almond, or maple praline, or any ice cream, really...) would be a perfect complement to the flavors in this pie. Maybe concocting a pairing for this week's dessert will be next week's project. Stay tuned. 

PS - If this end of the flavor spectrum is too sweet for your palette, Martha Stewart has a recipe for Peach Basil Crumble that has never disappointed me. 


Tuesday, August 19, 2014

Chocolate Beet Cake with Cream Cheese Frosting

I've recently become acquainted with a garden owner/constant veggie source, which is paradoxically awesome and problematic; while I thoroughly enjoy frequent access to fresh-grown produce, I have nurtured a deeply-entrenched dislike for beets for more than three decades. Yet they keep showing up at my house, furtively mixed in with zucchini, tomatoes, spaghetti squash, and various and sundry herbs. Thankfully, the internet exists, and there are a plethora of ways to use beets in recipes whose final products don't taste like they contain beets. In particular, I was intrigued by the beet chocolate cake recipe I kept coming across, so that is the topic of today's baking adventure. (I know last time I promised you peaches. I'm a beet-inundated liar, what can I say? Next time, there will probably be peaches).

After comparing various version of this recipe, I chose this variation from The Modern Cook for two reasons. First, it didn't try to pressure me into adding a beet-flavored frosting to my beet chocolate cake like so many of the others did (In college we used to love the "How Many Is Too Many" game. I believe it originated with Oreos, but can apply to so many life situations...like beet cake with beet frosting. Seriously? Please). The Modern Cook's recipe called for adding two cups of beet purée to a generous helping of cocoa powder, sugar, and other normal baking ingredients, and then topping the cake with regular cream cheese frosting, all choices to which my beetoclastic pallet and I were amenable. Second, I had all of the ingredients for the cake and frosting already in my pantry and fridge. Decision made.


So here are what cooking beets look like. They needed to be soft before I could purée them, so into the pot they went. The cooking process took more than half an hour, and by the time it was done, my kitchen was a humid, beet-smelling jungle.


After they were soft enough, I peeled off the skins and cleaned up the hairy, root-ingrown pockets. Everything from my cutting board to my fingernails was pink.


The beet chunks went into the food processor and puréed for a few minutes. This is probably when the smell was at its earthiest, and I was having serious doubts about my decision to try to bake with ingredients that make my stomach quiver...in the bad way.


Once the beet-preparing portion of the recipe was complete, things started feeling much more dessert-like in this recipe. I added the eggs, butter, sugar, and dry ingredients, which, when coupled with the beets, created a delightfully pink batter.


Also, while the beets had been cooking, I prepared my 4oz. jars with non-stick spray and hand-cut parchment paper discs in the bottoms. The batter, originally intended for two 9-inch cake pans, filled 2 dozen jars.


The first adjustment I had to make to the original recipe was to reduce the bake time from 45 minutes down to 30 for my little jars. When half an hour had passed, a toothpick inserted into their middles told me that my cakelets were done, so I took them out, let them stand for about 10 minutes, and then cooled them on wire racks while I prepared the (mercifully beet-free) cream cheese frosting.


The second adjustment I made was to double the frosting recipe. The prescribed amount may have been enough for two layers of 9-inch round cakes, but for me to adequately fill two layers of little jars, I needed a little (ok, who am I kidding...a lot) of extra to work with. While the cakes cooled and I made the frosting, I made sure to run my jam jars through the dishwasher so they'd be clean and dry for the next steps.


After making the frosting, I transferred it into a quart-sized plastic zipper bag (we call those "poor-girl's pastry bags" in this kitchen) and let it chill in the refrigerator for 20-30 minutes so it was easier to work with. Then I went through the process of slicing each cakelet in half, replacing the bottom half in a newly-cleaned 4oz jar, adding the first layer of frosting, setting the other half of cake on top, and finishing things off with a generous second helping of frosting. This may sound tedious, but I surrendered to my OCD tendencies and had a ball making everything even and pretty and nice.


The finished products were uniformly adorable. When I taste-tested them, I swear I could still detect a (fairly strong) hint of beet flavor, but maybe I'm being oversensitive. I'm going to do some blind sampling with my colleagues at work, and we'll see if they can pick out the mystery vegetable haunting the recesses of this dessert's flavor profile. 


My admittedly-subjective and unfounded beet prejudices aside, these cakes were moist, and the sweet, tangy frosting was the perfect complement to their rich flavor. Maybe, just maybe, by the time I finish devouring all of these cuties, I'll have acquired a new-found tolerance for the freak of nature that is The Beet (but let's not hold our breath). 


Friday, August 8, 2014

Chocolate & Peanut Butter Pretzel Tart

I’ve been traveling a lot lately, and I feel like the 4oz Kitchen has been a bit neglected, so August is going to be The Month of Lots of Baking. Today’s recipe for Chocolate & Peanut Butter Pretzel Tartlets is actually one of my all-time favorite desserts from Emily Hilliard at Nothing in the House (Have you been there yet? Go there. Seriously. You’ll never want to leave). I've made it a few times over the past couple of years, and it's never not been a home run. This simple tart is filled with creamy peanut butter swirled into rich chocolate ganache, and the crust is packed with pretzels. So you’ve got your sweet meeting your salty, your creamy meeting your crunchy, and good luck putting down that fork. At this point I should confess that I’ve never actually gotten to the point of using a fork with this tart because whenever it’s in the house, my impulse for immediate gratification becomes overpowering and I go at it bare handed. But you get the idea. 

Now I know it’s summer, which means peaches are in season along with myriad other fresh ingredients. However, a few days ago, I went to sleep on July 31, and something terrible happened overnight.  August reared its ugly head, and the inevitable end of summer vacation began looming in a very real and ominous way on my mental horizon. In such a bleak state of affairs, I didn’t need fruit, I needed comfort food – so here we are.


Like I said before, this is not a new recipe; I’ve made it a handful of times in the past, but this time I made a deliberate decision to be more liberal with my application of butter, and this was a good choice.


For instance, I used a good half of this stick of butter on the six waiting tart dishes along with a light dusting of flour. Not only did it make removing the tarts from their dishes a painless process, but I feel confident that the flavor of the crust was improved slightly as well.


Here’s my dough ball, comprised half of flour and half of crushed pretzels; it turned out to be a nice mix of sweet and salty. In the past I’d used a rolling pin to crush my pretzels by hand, but this time around I used the food processor, which turned out to give me a better consistency for the crust. While you can see that a few chunks of pretzel remained, which was good for flavor and texture, the finer pretzel powder seemed to help the dough hold together better overall.


Unlike other, stressful tart crust experiences, this one behaved impeccably as I rolled it out between two sheets of plastic wrap. I think the recipe called for waxed paper here, but I like to be able to see exactly how my crust is holding up, so I went with a more transparent alternative.


Once the dough was about 15 inches in diameter, I cut out circles using my trusty martini glass (the circumference of which makes the perfect mini-tart-dish-sized circle)  and pieced the crust into my waiting, (heavily buttered) dishes.


The original recipe makes a 12-inch tart, so I had more than enough dough. If I’d had more tart dishes I could have gotten at least two more crusts.


Here’s the next moment of extra-buttery goodness in this recipe. For the first 20 minutes they’re in the oven, the crusts need to be covered with aluminum foil that’s been buttered on the underside.  I promise, you guys, there are few little things in life more subtly satisfying than smearing soft lumps of butter over a smooth surface. I especially recommend foregoing the spatula and using your hands.


After my crusts were baked and cooled, preparing the ganache was a simple “heat the cream, pour it over your really tasty Ghirardelli dark chocolate chips, wait 5 minutes, whisk, and keep lovin’ life” kind of thing. The peanut butter just needed to be warmed a little to melt. Pour your warm, gooey fillings into your crusts, swirl around, and voilà: dessert to die for.


These tarts taste just like my favorite Ben & Jerry’s flavor, Chubby Hubby. This ice cream was also our go-to snack in college when my roommates and I needed some emergency stress reduction via food therapy, so no wonder I started craving it the morning after having my first school-related anxiety dream (wherein I found myself in front of a classroom of first graders, I was late to a student government meeting, and a tornado raged outside the window – yikes). So I’m going to take a step back, take a few deep breaths, and savor the last weeks of summer while I work my way through a few of these bad boys. 


Post Script: Part of me does feel a little guilty for neglecting summer fruit season though, so check back soon for some peach-inspired, herby-spicy goodness. 

Wednesday, July 23, 2014

Banana Whoopie Pies with Maple Almond Butter Filling

Today’s recipe started out with the best of intentions. Remember how the road to hell is paved? Yeah.

A friend and I recently had the opportunity to make maple almond butter from scratch (we used this recipe, and the finished product was very similar to Justin’s, the real deal). The result was so pleasant that I was beyond eager to highlight this ingredient in a pastry of some kind. After combing the interwebs for inspiration, I decided the nut butter would be perfect in a filling for banana whoopie pies. In my imagination, the finished product would taste like a tricked out version of banana bread and be much cuter. I was correct in one of these projections.

To achieve my banana nut butter whoopie dreams, I cherry-picked elements from two of Martha Stewart’s recipes, adapting the second one to accommodate the almond butter. The first four steps of this recipe provided the perfect banana cakes to be the top and bottom of the whoopie pies. And here I took Martha’s recipe for whoopie pie filling and tweaked it a bit. Perhaps that’s the lesson to take away from today’s failure: Don’t. Tweak. Martha. 


Things started off normally enough. Bananas were mashed and dry ingredients were combined. Today my friend Lindsey agreed to be guest sous chef. Here she gracefully combines and sifts flour, baking soda, baking powder, and salt.


And this is what happens when you assist a tyrannical baker in her 4oz kitchen. Lindsey was about to cream the sugars and butter when I challenged her about the adequacy of her butter’s softness. I felt like it wasn’t soft enough, but she persuaded me otherwise by putting two sizeable finger holes into the stick. Point taken, Lindsey, point taken. (Game of Thrones watchers, does this picture remind anybody else of the tragic fate of one Oberyn Martell?)


Butter-based conflicts aside, everything was going smoothly at this point. The batter turned out great, and after about 15 minutes in the oven, we had enough cakelets for 15 whoopie pies.


The next step is decidedly where things took a turn, and messing with Martha came back to bite me. Starting with her whoopie pie filling recipe, I substituted my home-made nut butter instead of regular butter (the internet said this would be okay; News Bulletin: the internet lies). I also added about 3oz of cream cheese to temper the sweetness of the confectioner's sugar and marshmallow fluff. In retrospect, this was probably a poor choice. When everything was combined, the filling looked pretty normal, and I was extremely satisfied with the flavor resulting from all of my variations. Lindsey and I visited a special little corner of heaven when we taste tested the finished product and put a dollop of it onto one of the reject banana cakes.


Sadly, the consistency of this filling left lots and lots to be desired. It was much too heavy and runny, so the cake tops and bottoms slid all over each other instead of sticking together neatly. Eventually, the notion came to us to use toothpicks to secure the cake pieces together, and we let the finished sandwich cakes set up in the freezer just to make sure. Finally, the whole situation surpassed the point of salvaging and instead became laughable. Very Laughable. These are definitely the most pitiful looking desserts this kitchen has produced in a long time – maybe even worse looking than the results of The Great Cake-Pop Debacle of ’09. But if you don’t mind getting your fingers a little sticky, and if you close your eyes while you’re eating them, these really do taste pretty stellar, so I’m going to stop apologizing now. And maybe respect Martha's instructions a little more reverently in the future.


Also, to redeem ourselves, Lindsey and I broke out some impossible-to-screw-up puff pastry I had in the fridge and tried our hand at pastry origami. Those turned out quite pretty, so we ended on a high note after all.

Before:

And After: 


Sunday, July 13, 2014

Harvey Wallbanger Cake

I'm visiting Nashville again. Surprise surprise. My good friends Emily and Aaron agreed to let me set up camp in the living room of their new apartment for the week, and one goal Emily and I set for my visit on top of catching up, enjoying the city, and getting her new kitchen organized, was to return to the good ol' Booze Cakes cookbook (Aaron was part of all of these goals too, of course, but  he may have been less aware that Booze Cakes were always part of the plan. Nevertheless, he was a good sport since eating baked goods was his primary role in this particular project). So on Friday, after perusing many tempting options, Emily and I settled on a cake meant to capture the flavors of the  Harvey Wallbanger cocktail, named after the popular Manhattan Beach surfer who was a regular patron of Duke's Blackwatch Bar on Sunset Boulevard in Hollywood. What better inspiration for a summery cake than a drink that would fit right into Beach Blanket Bingo? 

Basically, the Harvey Wallbanger is a screwdriver with Galliano, an anise-flavored liqueur, floated over the top. Of course we decided that it was only appropriate to make actual Harvey Wallbangers to sustain us while we labored through the arduous six-ingredient, two-step project, and at this point I would like to officially register a request for someone to please remind me how much I dislike anise-flavored things if I ever, EVER get the idea to make this drink (or cake) in the future.

So to start, here are the components. See the boxed cake mix and the packet of instant pudding? That's called cheating at life. But the cookbook told us these were all the things we needed, aside from eggs, oil and liquor, so we drank our drinks and followed instructions.


Our cake's inspiration: the Harvey Wallbanger was allegedly invented in 1952, the same year that Queen Elizabeth took the throne and the TV show Dragnet premiered. My grandma surprised me last Christmas when we were chatting and she off-handedly mentioned how she used to drink these on New Year's Eve when she was younger. So Emily and I toasted to cool grandmothers everywhere as we sampled our drinks and started baking.


Dump all of the ingredients into a bowl at once and mix? Check.


Pour into a well-buttered-and-floured bundt pan and make another cocktail because maybe you'll miraculously start liking the flavor of Galliano this second time around? Check.


After 45 minutes, our cake was ready to cool and come out of the pan. It smelled as good as this picture looks. No joke.


Someone may have been a little over zealous with the flouring of the pan, but that cake sure didn't stick when we flipped it over. We'd also used Emily's non-stick cake pan from William Sonoma which was pretty boss, so that probably didn't hurt either. The cake cooled for half an hour or so before we were ready to move onto the last step: prepare and apply an orange glaze lightly infused with vodka and Galliano...


The trouble began when Emily slipped off to the kitchen without telling anyone. She was trying to make glaze in stealth mode so I wouldn't notice her using her own recipe instead of following the Booze Cakes instructions. Aaron and I caught her just as she was adding a few glugs of OJ to a bowlful of confectioner's sugar. Now, any of you who read this blog regularly know how I was recently burned when I tried to use the "I'll Just Eyeball It" technique to measure small amounts of concentrated liquids (if you have no idea what I'm talking about but you care to find out, refer to the Blueberry Sour Cream Tartlets post from last month), so you can imagine my dismay when I caught Emily in the middle of just such a transgression. At that point, we had no choice but to hold a a glaze-off, in which I followed the cookbook instructions to make the cake glaze and Emily tossed ingredients into a bowl in what appeared to be a helter skelter fashion. Aaron agreed to be our objective judge. Guess who won. (Also guess which one of us neglected to mention that she'd been making glazes for large batches of holiday cookies for decades, a fact which, had I been cognizant of, would have saved me much consternation and general freaking out). Emily's was better. Way better.


After the superior glaze has been adequately drizzled onto our cake, we'd reached the end of the recipe, but we felt like some elements of visual appeal were missing. After all, we eat with all of our senses, right?


So Emily got out her mandolin and sliced us up some paper thin orange garnishes. Much better.


And while we're covering things with things, why not add a little dusting of confectioner's sugar?


Witness this open toolbox, mail pile, and fancy dessert: If I were feeling poetic, I'd suggest that kitchen tables were a nice symbol of complexity because they're the point of intersection where so many diverse elements of life come to rest and temporarily juxtapose one another, inviting us to consider how the different aspects of our existence are similarly bound together yet always in tension.  Life influencing dessert, or dessert influencing life?  


so much depends
upon

a liquor soaked
cake

glazed with powdered
sugar

beside the red
toolbox.