
With snack-related childhood
traumas in mind, I taste-tested this week’s recipe not without a modicum of caution (and nostalgia). Thankfully, my old age has apparently
granted me a little more patience when it comes to first bites; I avoided a
burnt tongue this time around, and I was delighted with the flavor and texture
combination of tangy fruit and sweet (but not too sweet) cream cheese filling
nestled inside a flaky pie crust pocket. These are so much better than
store-bought poptarts, and probably a little healthier?
Today’s recipe actually started
percolating in my imagination a few weeks ago when I got an amazing early
birthday present from a good friend of mine: a Handheld Pies cookbook. This
recipe book has instructions for lots of different 4oz fare: sweet and
savory, free-form and structured, open-face or crust-topped. Basically, I could
prepare one item from this book every week and have new blog posts for the rest
of the year.
The other great feature of the
Handheld Pies cookbook is the index of general instructions; they lay out the
basic mechanics of making various types of miniature pastries so it’s easy to
adjust and ad lib recipes based on what ingredients you have on hand. Or, in my
case this week, what ingredients you have to get rid of. In the same way stir
fry or stew are great catch-all dishes to use up a mishmash of veggies in your
fridge before they go bad, these free form hand pies are a great vehicle to
utilize the last bits of fruits and jams that may be on the verge of spoilage.
Sidebar: If stew and stir fry aren't your thing, there’s also a whole world of
savory handheld pies if you’re looking to dispose of meat/cheese/veggies. But
that topic will be saved for the “Make Your Own Hot Pockets” post, which seems
more appropriate for winter time. So today we’re focusing on sweet things.

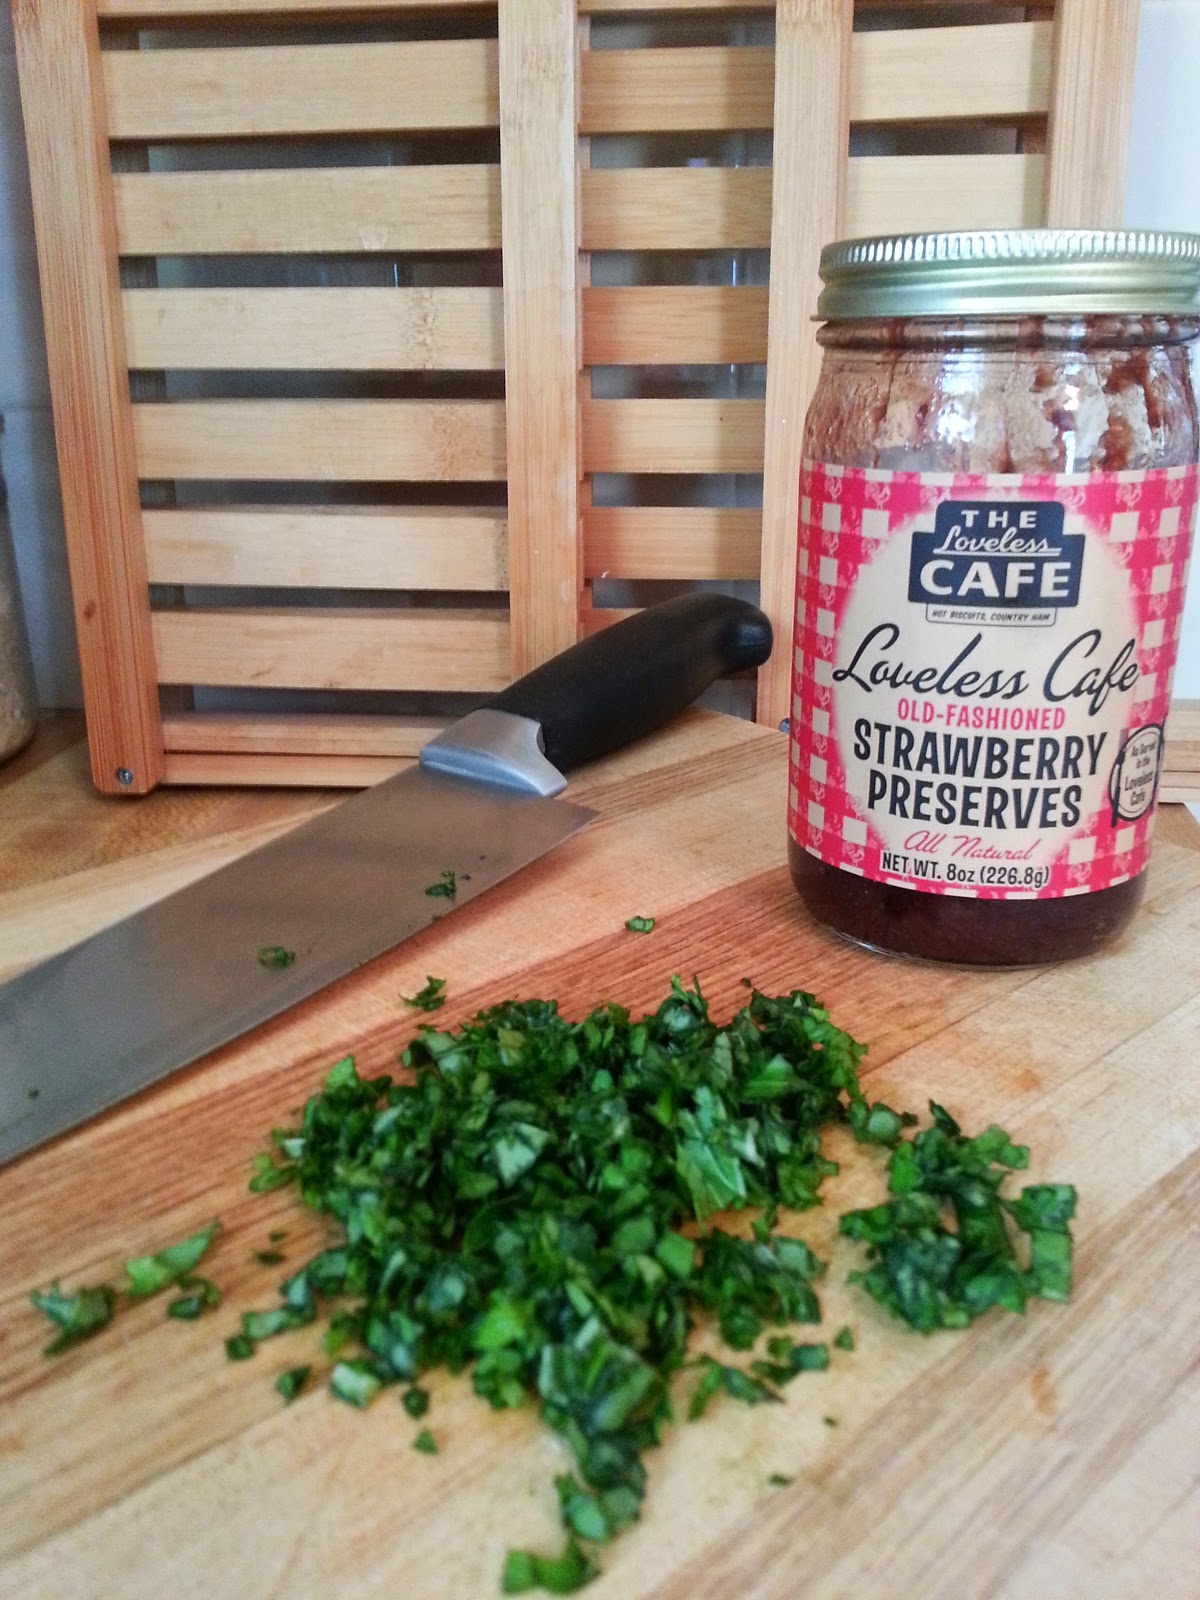
I started with about half a cup of the strawberry and blackberry
jams. To the strawberry, I added about 1 ½ teaspoons of fresh minced basil, and
to the blackberry I added about ¾ teaspoon of culinary lavender. I did this right
away so the flavors had plenty of time to fuse while I prepared the crust.
Once the ingredients were decided,
I rolled out the dough. Confession two: I used pre-made pie crust for this recipe
instead of preparing my own from scratch. In retrospect, I think for this
recipe, making my own would have been smarter because the pre-made dough is
circular, whereas I needed rectangles for these hand pies. In the time I spent
rolling, cutting, and reshaping my round dough into the shape I needed, I
probably could have whipped up the real deal. I’ll remember that for next time.
But I digress.

Here is my work space half way through the rolling-and-cutting
process. Top and bottom crust for one pie gave me enough dough to make nine
3x4-inch pies. Conveniently, the 9 portions fit perfectly on my baking sheet.


Next up: The step wherein the
baker learns how damn runny her stupid strawberry jam is. This got a little
ugly, but I tried to evenly spread a couple of tablespoons of each of the jams
over the cream cheese mixture. I wanted to keep a half to a quarter inch of
space around the edge of each pie to seal to the top layer. Some attempts at
achieving this were clearly more successful than others.


To help myself distinguish between jam varieties, I sprinkled some extra minced basil over the strawberry pies and some lavender buds over the blackberry ones. I also used a toothpick to prick holes in the pie tops for proper venting while they were in the oven. However, before baking, I chilled these in the freezer for half an hour, and it really seemed to help them keep their shape during the baking process. Definitely do not skip that step if you try this at home.
The pies baked in a 375 degree
oven for about half an hour. When they came out, I let them set on the baking sheet for about 10
minutes before transferring them to a wire rack to cool completely. You may
notice that there are only 8 pies on the rack below, while there were 9 when they
went into the oven. One of the blackberry pies may have fallen onto my kitchen
floor and splattered into a steaming hot and presumably delicious pile of
pastry while I was transferring it to the wire rack. A sacrifice
to the kitchen gods, I suppose. Maybe said gods were pleased with my offering
and rewarded me by protecting my tongue from being burned when I did my taste
test a few minutes later.

Anyway, these were easy to make
and even easier to eat. And they are, like I’ve said before, incredibly
versatile. They would be a perfect addition to a 4th of July potluck, an outdoor
concert picnic, or any other summer activity demanding finger food at its finest.
No comments:
Post a Comment